-1.png?height=120&name=Logo%20With%20RegMark-Grey%20(1)-1.png)
Once the machine has scanned the Home Location Code, a screen for selecting cleaning routes appears on the touch screen. Home Location Codes are scanned with the camera on the front of the machine (see “Names of Parts”). Move the machine to where the distance between the camera and a Home Location Code is approximately 80 cm (32 inches), and stop the machine so that the Home Location Code and machine are parallel. If the machine is not positioned properly, it cannot scan the Home Location Code.
Planning a Cleaning Route
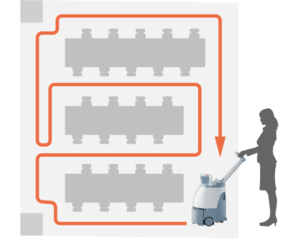
Teach a route that will allow the cleaning area to be cleaned the most optimally and efficiently, taking into consideration its layout and size (area).
-
During autonomous cleaning, the machine will operate at a relatively low speed for safety.
-
Time from start to completion of autonomous cleaning will be longer than the time required to teach the cleaning route. Consider how long the battery will last when teaching a cleaning route.
■ Planning the Space and Frequency
It is also important to consider the environment of the cleaning area when planning a cleaning route. For example, teaching cleaning routes individually for an area that is cleaned every day (entrance or lobby to a building, the corridor where people are always walking) and for a low-cleaning-frequency area only cleaned several times a month allows more effective cleaning.
When planning cleaning for a long route, check that the battery is fully charged beforehand, and take into consideration how long the machine will operate.
■ Several Areas of Differing Types
In some instances, such as in offices and schools, it is not possible to easily divide a space into cleaning zones. You should, therefore, check the entire cleaning area beforehand, and plan a route so that the machine can easily complete cleaning in a logical and predictable sequence.
For example, in an instance where there are several buildings to be cleaned or where there are several structures to one building (college campus, etc.), using a different Home Location Code for each floor and each structure will allow a machine to start/stop near a space where cleaning is carried out, and enable long traverses to be avoided. It is recommended to divide a cleaning area into smaller zones for easier cleaning and management where locations are spacious or have a special layout.
Teaching and Saving a Cleaning Route
Before teaching a cleaning route, check “Precautions when Creating a Teaching Route”
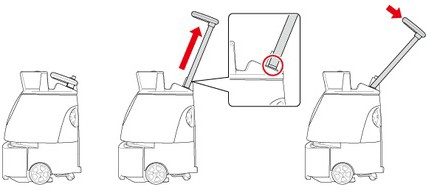
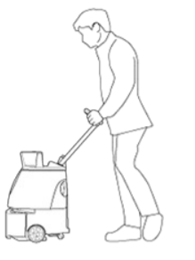
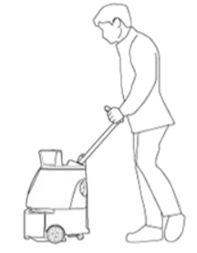
- Pull the steering handle up as far as it will go, and lower it toward you
- Move the machine to the Home Location Code where cleaning is to be carried out (see “Home Location Codes”)
-
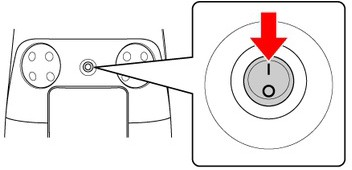
Press the main power switch (I/O) to set it on (I)
- On the touch display, tap “TEACH ROUTE”
A screen appears on the touch screen for selecting “TEACH ROUTE/RUN ROUTE/SETTINGS”.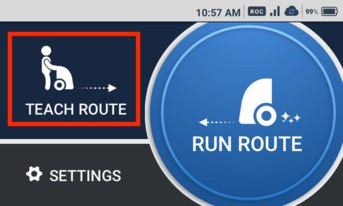
A screen for scanning a Home Location Code (see “Home Location Codes”) appears. - Place the machine so that the machine’s sensor and the Home Location Code are parallel, and scan the Home Location Code
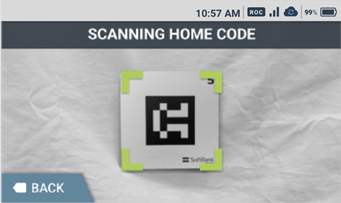
- When the machine has scanned the Home Location Code correctly, a green frame appears. Otherwise, a red frame appears. Check that the Home Location Code is placed in the correct location ("Home Location Codes"), or that the Home Location Code and machine are distanced about 80 cm (32 inches) apart.
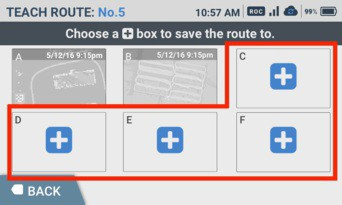
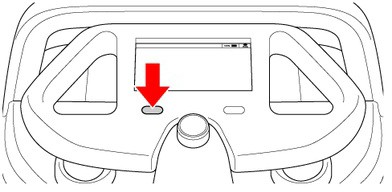
6. Select ![]() for where to save cleaning route
for where to save cleaning route
- The selected spot is assigned to the new cleaning route.
- Once the number of saved routes has reached the limit, either delete existing cleaning routes (see "Deleting Cleaning Routes"), or scan a different Home Location Code.
7. Press the vacuum power button (see “Vacuum Power Button”)
- If the floor is in a very bad condition, use Max power mode (see "Max Power Mode Button").

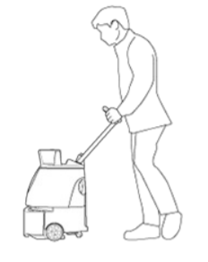
8. Use the steering handle to move the machine, and clean the entire cleaning route (teaching route)
- Changing between normal mode and max power mode (see “Max Power Mode Button”) is also learned in a cleaning route.
- Teaching a cleaning route with few detours allows the machine to travel with fewer decreases in speed for more efficient cleaning.
- The speed at which the machine travels as you are cleaning along the cleaning route (teaching route) has no effect on automatic travel. Clean at your own pace, stopping to check the cleaning route, etc. as needed.
- Be sure to move the machine forward. Backward movement is not learned in a cleaning route.
- Do not lift the machine up from the floor while teaching a cleaning route.
- Do not abruptly stop other than for an emergency. Suddenly turning the machine or changing directions while teaching a cleaning route may affect the teaching of the cleaning route. Make sure the machine travels in as straight a direction as possible.
- To cancel cleaning route teaching, pause the machine, and on the touch display, tap “CANCEL ROUTE”→“YES - CANCEL”.
9. Press the Vacuum power button
The cleaning mode will turn off.
10. Tap "Save Route"
11. Return to the Home Location Code scanned at procedure 5
12. On the touch display, tap "SCAN/SAVE"
The cleaning route is saved.
- The saved route appears in the “RUN ROUTE” menu
